So, maybe I’m overreacting a bit but I’m completely ecstatic about what transpired for me today…allow me to explain.
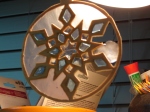
I explained in my last entry that my hubby had given me a scroll saw this past Christmas. After much frustration (the people that scroll saw the signs at county fairs make it look incredibly easy!), I finally produced a completely jacked-up snow flake Christmas ornament.
Yea, it’s horrible…I know it. It frustrates me that I didn’t do better at scroll sawing on the first attempt (normally, I can pick things up with little effort…not this time) but, I had to start somewhere. I’m going to have to practice in order to take this further but it’s so worth it after what I was able to accomplish today!
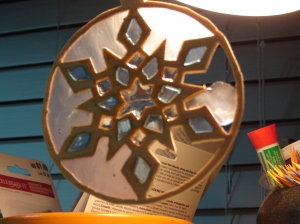
After I took this picture, I put clear packaging tape on the back side (the worst side, actually…) and burnished it down so the resin wouldn’t leak out when I poured it. Then I placed it on a paper plate with the tape on the bottom leaving the top open. Then I mixed the clear resin and tinted it with oil pigment and poured it into the openings.
So I mixed, and I poured…and I stunk up the house with noxious fumes. In this picture you can barely see the tape peaking out of the parameter of the ornament but that’s the only thing keeping the resin from pouring our all over the place. In very simple terms, I’m trying to create a sun catcher (even though my end product is going to be much more elaborate) because I want to be able to back light the resin to make a stained glass effect. Well…it worked!!!!!!!!!
I put a fairly high ratio of hardener into the resin in order to get a really solid cure so after about 2 hours (it takes about 24 to completely cure) I carefully removed the tape backing to see if the inlay would fall out and it didn’t. Sometimes the resin shrinks when it cures but so far so good.
I also wanted to be sure that I could maintain an element of transparency (necessary in order to be able to have the desired effect in the final project…this was only an experiment) and the transparency remained! I kept two of the sections open as a comparison to the filled sections to see if there would be a notable difference (I was only going to leave one section open but I ran out of the opaque blue and didn’t want to mix any more…the fumes are intense) and there was an obvious difference.
In closing, I’m blissfully happy about the results! There are still a few bugs to work out (most notably my complete lack of skill in using a scroll saw at this time…) but I think I’m getting closer to being able to create a “stained glass effect” inlay in wood.
More projects to follow….


I think it’s beautiful!! But it’s hard to determine the actual size,
LikeLike
Thanks Sis! It’s only about 4 inches in diameter…just a test.
LikeLike
wow! i think i just landed on the right blog! if there was a word better that ‘awesome’ that i could think of right now, i would use it!
LikeLike