Tag Archives: craft

I’ve expanded my “project” for making patterns for my knitting and crocheting!!

Standard
Banner for Cape Cod Stitchery; where my pattern designs will reside.

Cape Cod Stitchery; where the information regarding the knitting and crocheting patterns designs will reside.

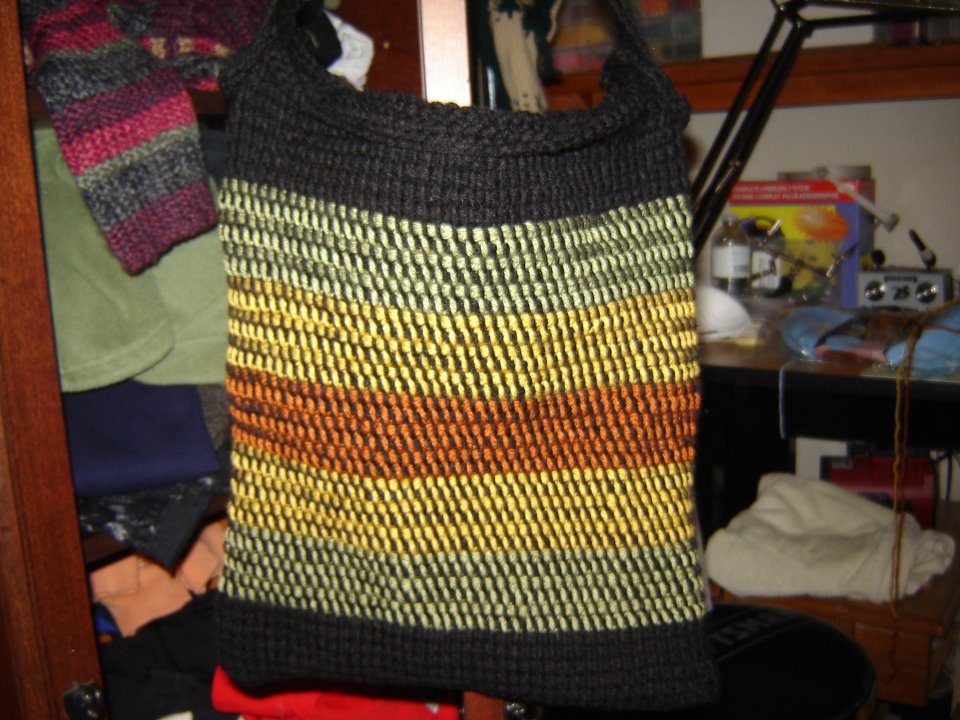
Hello to my faithful followers!  I haven’t been around for a little while, because I’ve been a bit busy working on my latest project; not only have I been creating more baby blankets but I’m now actually writing down the patterns for the projects that I’ve designed and am in the process of creating PDF’s from them for publication and putting them up for sale (for a reasonable price even though they take quite a bit of time to create) on Etsy and Ravelry.

There are two main reasons for why I decided to finally make my own patterns.

First, and most importantly, I’ve discovered that the patterns that I see published in knitting/crocheting magazines look very complex and more time goes into deciphering the pattern than goes into creating it.  I guess that’s why I decided to start designing my own creations…it was just easier to do. Fairly recently, the software to create professional looking knitting and crochet charts has become obtainable, by people like me, who have enough of a working knowledge of graphics design to be able to make written charts and patterns clear and easy to follow.  This is so anyone that has a basic working knowledge of knitting and crocheting can accomplish them without frustration.

Secondly, I’ve discovered by looking at my own creations, that making something beautiful doesn’t need to be ridiculously hard to do.  I’ve had several people tell me, over the years, “That blanket looks so difficult to make, I can never do that!” even after I assure them that the projects are actually easy to do.  Since the “pattern” was in my head, trying to explain how to do it was nearly impossible.  I’ve resigned myself to making patterns that are not only clearly explained, with a chart provided if the project can be simplified by creating one, but to also provide step by step instructions (with images) of how a stitch is made.  I’ve also figured out how to create videos, for posting on YouTube, explaining the process as well.

With that said, designing and publishing simple and easily explained knitting and crocheting patterns is my objective.

I’m very close to posting my first pattern, that hasn’t been posted yet but will be shortly, so I’ve created another blog specifically for knitted and crocheted projects that I make, and sell, patterns for: http://capecodstitchery.com/; please pop over and take a look!  This is an image of the first blanket that I’m making a pattern for; a herringbone stitch baby blanket in sage green and off white stripes with an I-cord edge:

cropped herringbone blanket

I will still post my personally made projects here on Etch Stitch and Burn so please continue to pop in, from time to time, to see what I’ve been up to.

Thank you for all of the support!

Advertisement

Here are the latest projects in yarn.

Standard

Even though I haven’t updated my blog in a while, I have been busy crafting.  Granted, I haven’t had a lot of time to do it but the least I can do it post them.cable baby blanket 3

Pictured to the right is my most recent creation, a cable knit baby blanket.  I’ve never been much of a knitter but have always been intimidated by doing cables so, since a friend of mine at work is preggers, I decided to take the plunge.  Much to my surprise, it was incredibly easy to do!  Since I’m not one for following patterns, I decided to design my own and this is what I came up with.  It looks incredibly difficult but I’m very happy with how it turned out.


flower granny square blanket This is a granny square blanket that I ended up doing for one of my co-workers before his daughter was born.  Again, not being one for following patters, after the lavender flower was created, I pretty much went on my own for this one.  I was so happy with how it turned out, I entered it into our local county fair, last year, and got a blue ribbon for it!  A local yarn shop liked it so much, they gave me a $25 gift certificate also.  I’m glad because I really love the store! http://www.sageyarn.com/


granny square blanket 1Again, this is another granny square baby blanket for another of my co-workers that had a daughter on the way.  When I asked him what colors his wife liked and what the color of the nursery was, he said that she’s a big fan of pink and yellow.  This picture doesn’t show the colors very well but trust me…it was REALLY pink and yellow!  Again, no pattern…just winged it.


tunisian crochet baby blanketThis is another baby blanket I made, during the creation process, in a different technique called Tunisian crochet.  It’s actually a very old technique that was used quite a bit during the 30’s and 40’s but was called an afghan stitch instead of Tunisian crochet.  By mixing up the colors, I found that it makes a lovely hound’s tooth pattern.  I also made the crochet hook because, at the time, I couldn’t purchase one in the large size that I needed.  You guessed it…no pattern!


hippy bag tunisian crochetThis is the final picture I’m posting.  This is another example of Tunisian crochet, in the hound’s tooth pattern, but this is actually and handbag.  I did make this with a commercially available crochet hook and it made a very tight and rigid fabric.  I call this my “Dirty Hippy Handbag”.  Once again, without fail, this one isn’t from a pattern either.

So, there you go!  I hope I made up for my absence by catching my blog up with my crafting activities.  Thanks for looking!!

Another long absence but I’m back!!

Standard

Remember when on the last day of December, New Year’s Eve, when you’re sitting around with your family and waiting for the new year to come, the discussion always heads towards “I hope next year is better than this year!”

Well, it hasn’t been so far.  Actually, it’s been one step left of brutal.

The first of the year kicked off with a massive snowstorm that hit the New England and then I deployed to the Midwest for four months.  The time within the four months consisted of:

1.     Unyielding snow storms and bone chilling cold that didn’t let up.

2.     Complete homesickness being away from my husband (and my dogs) for so long.

and the worst one…

3.     My precious father passed away before our eyes.

Needless to say, I haven’t been feeling all that creative and crafty lately.  However, as it is said, “when God closes a door, he always opens a window”; a window opened after being consumed in the fog of loss and grief for my Dad.  Don’t get me wrong, I’m still hurting but a spark of my former self has returned, thanks to my husband, friends and family.

The first shot in the arm was that I decided to go back to college, thanks to the provocation of my friends.  I’m 6 weeks into my first class and I’m pulling a 98.2%; not too bad for an old lady such as myself.  The second is that it’s come to my realization that I’ll be eligible for retirement in the next 4 – 5 years and that I’d better start laying the foundation for what I’m going to be doing once retirement happens.  Knowing that once retirement occurs, my hubby and I will escape into the wilds of somewhere but a concrete fact remains that we are both technology geeks so wifi will be there…so I’m returning to the world of blogging.  I don’t know what I’m going to do with it but it’s time to give it a go again.

So, for my loyal followers that wondered what happened to me, I’m back and will do everything I can do stay relevant again.  Please forgive me, it’s been a really tough year…

I really don’t like winter…

Standard

My apologies, I haven’t had the ability to be very creative lately.  Don’t get me wrong, the ambition is there and I’m  still thinking about my newest project on an hourly basis but the stars haven’t alined properly for me to do so.

Shortly after finishing my last project, I started another one (a different style of snowflake ornament) in order to try and expand a color pallet for the inlay.  However…it was really cold!  Unbearably cold actually! It was impossible to be comfortable enough in my workshop to put in any time at my scroll saw.  That lasted for few weeks.

Once the clouds were parting on the arctic blast around here, I felt the pull towards the workshop again.  But alas…we got a blizzard here on Cape Cod last weekend!  I hadn’t been in a blizzard for a really long time so I’d forgotten how frustrating they could be.  The 1 1/2 feet of snow was frustrating enough along with the limited mobility (even though my husband and I both have 4-wheel drives) but losing power for 2 1/2 days was massively annoying!  Granted, we did better than most; we had heat, hot water, radio and light (in a limited capacity) due to the generator.  So many people had to leave their homes because they had nothing.  We even had one evening where we ran an extension cord from the bathroom, into the living room, in order to watch the movie “Army of Darkness” on my laptop with long retired speakers (I’m not even sure where they came from, only that I still had them) while cooking Ramon noodles in an old pan on the woodburning stove.  It wasn’t an ideal evening but we were cozy.

Anyway, the power returned and life went back to normal again so I’m hoping to get some saw time in this weekend.  I’ve been experimenting with different mediums to color resin with and I think I may be onto something.

Hopefully, I’ll have another entry coming soon.

I did it!!! My vision is a reality!!!!

Standard
I did it!!!  My vision is a reality!!!!

So, maybe I’m overreacting a bit but I’m completely ecstatic about what transpired for me today…allow me to explain.

I explained in my last entry that my hubby had given me a scroll saw this past Christmas.  After much frustration (the people that scroll saw the signs at county fairs make it look incredibly easy!), I finally produced a completely jacked-up snow flake Christmas ornament.

my pathetic first attempt at scroll sawing anything

my pathetic first attempt at scroll sawing anything

Yea, it’s horrible…I know it.  It frustrates me that I didn’t do better at scroll sawing on the first attempt (normally, I can pick things up with little effort…not this time) but, I had to start somewhere.  I’m going to have to practice in order to take this further but it’s so worth it after what I was able to accomplish today!

After I took this picture, I put clear packaging tape on the back side (the worst side, actually…) and burnished it down so the resin wouldn’t leak out when I poured it.  Then I placed it on a paper plate with the tape on the bottom leaving the top open.  Then I mixed the clear resin and tinted it with oil pigment and poured it into the openings.

the resin is still wet and incredibly stinky!!!

the resin is still wet and incredibly stinky!!!

So I mixed, and I poured…and I stunk up the house with noxious fumes.  In this picture you can barely see the tape peaking out of the parameter of the ornament but that’s the only thing keeping the resin from pouring our all over the place.   In very simple terms, I’m trying to create a sun catcher (even though my end product is going to be much more elaborate) because I want to be able to back light the resin to make a stained glass effect. Well…it worked!!!!!!!!!

the ornament holding onto the resin without a tape backing!!

the ornament holding onto the resin without a tape backing!!

I put a fairly high ratio of hardener into the resin in order to get a really solid cure so after about 2 hours (it takes about 24 to completely cure) I carefully removed the tape backing to see if the inlay would fall out and it didn’t.  Sometimes the resin shrinks when it cures but so far so good.

I also wanted to be sure that I could maintain an element of transparency  (necessary in order to be able to have the desired effect in the final project…this was only an experiment) and the transparency remained!  I kept two of the sections open as a comparison to the filled sections to see if there would be a notable difference (I was only going to leave one section open but I ran out of the opaque blue and didn’t want to mix any more…the fumes are intense) and there was an obvious difference.

a different lighting, I'm very happy that the colors stayed vibrant after curing

a different lighting, I’m very happy that the colors stayed vibrant after curing

In closing, I’m blissfully happy about the results!  There are still a few bugs to work out (most notably my complete lack of skill in using a scroll saw at this time…) but I think I’m getting closer to being able to create a “stained glass effect” inlay in wood.

More projects to follow….

Another year, a new project

Standard

Happy New Year Everyone!!  Hopefully 2013 will be a wonderful year for everybody!!

I have to admit, 2012 wasn’t an entirely bad year but I’m not shedding any tears for it’s passing.  I have always felt refreshed by the concept of a new year coming along and always resolve to change something about the way I live my life in subtle ways; some last and some don’t.  As in previous years, I’ve made some resolutions for this years also.  Nothing particularly difficult but will take a bit of commitment all the same.  My primary resolution, for the interest of the blog, is to take my “crafting” to a new level.  Hopefully, I may even achieve the level of “art”…but that is yet to be seen.  More detail to follow…

Anyway, on my last post, I had discussed my intention for integrating wood and resin.  In all honesty, the dog paw in the small, wooden box was exhausting to pull off.  The hand carving of the paw about broke my hand as I did it with a Dremel freehand…big mistake.  However, the possibilities of what I can do with the integration of wood and resin has been brewing and building in my mind ever since.

Thanks to a very generous Santa Clause this year (my dear hubby), I now have a brand new Ryobi Scroll Saw and a brand new NICE camera to use to document my progress.  For those of you that don’t know what the capabilities of a scroll saw are…stay tuned; it’s difficult to explain but can easily be shown in pictures and videos.  Both of which I fully intend to have in my blog entries this year.

Just as before, I am a working woman and time to dedicate to my craft is brief so blog posts aren’t going to be very frequent for the foreseeable future; but I’ll do my best.  I’ve very excited about the new direction I’m about to embark on and the cool little workshop I now have in the basement!!!

Thanks for the support through this and hopefully we can have another inspiring year!!


Resin Inaly in Wooden Box

Standard

my resin inlay experiementAfter much consideration and thought, I had found myself in a rut.  I enjoy crocheting and knitting but it’s not that fun to do when it’s hot as hell outside and oppressively muggy inside.  I enjoy creating the wooden boxes, that I’ve blogged about previously, but that project had also run it’s course.  Woodburning and painting was fun but “been there, done that”, I needed to find another direction to take my crafting…I was in a rut.

While surfing around the net one night, I stumbled upon the art of working with resin casting on You Tube.  The techniques documents were primarily for jewelry (pendents and bracelets mostly) and while it’s completely charming to imbed candy into clear resin and wear it around your neck for eternity…it really wasn’t my thing.  Then I found a video of a man that would put colored resin inlays into the neck of guitars; while interesting…I don’t play much anymore so that didn’t help either.

But I had a moment of enlightenment; is it possible to inlay colored resin into wood, or better yet…a wooden box?

So my quest for knowledge began.  I looked up everything I could on the internet about resin, casting resin, molding resin and coloring resin.  Again, it was mostly geared towards making jewelry (other than my wedding rings, I rarely wear it) so I began looking for resin inlay techniques for wood.  Amazingly enough, all I found was a single Acrobat document that was produced in 2009 for a woodworking magazine.  I was pretty much on my own for this one.

I began gathering the supplies that I would need to start my experiment; luckily I already had most of them (paints and colorants) but purchased the actual resin and mixing cups from a craft store.  The syringes were a bit tricky (thank God I don’t look like an intravenous junky) but I found a pharmacist that sold me 16 syringes for 10 cents a piece because they were expiring their useful date for medical use and they were going to be pitched anyway.
useful things for casting and coloring resin

I had a little wooden box, that I’d purchased for a dollar,  that had a lid that was about 1/2 inch think and perfect for my inlay experiment.   I got into my vast supply of clip art books and found a simple dog paw pattern that fit nicely on the lid.  After transferring the clip art onto the lid, I used a Dremel to cut a recess of about 1/4 inch into the lid (I didn’t want to cut through the top because the resin would run out).  After the cutting was finished, I made sure that the lines were clean so after the excess resin was sanded off, a clean inlay would remain.

After blowing off the sanding dust, I proceeded to mix the resin (you have to combine it with a catalyst in order for it to harden) and it stunk to high hell.  I didn’t want to just cast clear resin so I had some silver/grey powdered mica that I mixed in.  After I combined the mixture to my satisfaction, I used a syringe to fill the recessed areas on the lid of the box.  I actually overfilled the cut out area because there’s a slight shrinkage upon the resin curing (I’d only read about it…no actual experience in how much shrinkage would take place) and the syringe made it a very clean and tidy process; I intended to sand the resin down to be flush with the lid anyway once it was cured.

After the filling and the curing (I put the box with the un-cured resin under a lamp that put out some heat) and waited for 24 hours.  The next day, I hand sanded the box until the resin was flush and smooth.  The one disappointment I had was that the resin was quite dull and blended with the matte finish of the box, I was hoping for a glossy finish.  Easily solved!  I dug into my collection of paints and finishes and found a bottle of Triple Gloss Acrylic that I painted on to create the shine.

Overall, I’m encouraged and actively working on my next project…of course I will blog about it.  Keep an eye open on my blog; more good things will be posted soon!!!!
Thanks for reading!!!

My crafting ways take a back seat to life way too often

Standard

but still needs a button...

It just dawned on me, as I sit at the computer drinking my morning coffee and trying to wake up, the things I enjoy seemed to have taken a back seat to factors of my life that are necessary.

I make lists in order to make it through my life somewhat organized.  The lists contain bullet statements to remind me of what I need to do once my “stage one” activities take place.

What are the stages that rule my life??

  • STAGE ONE: work and sleep; the things that I have to do in order to exist with some level of comfort in this life but leave very little wiggle room for extra activities or accomplishments.  No list required in this stage.
  • STAGE TWO: necessary things that can be put off for a little while but not for long.  These items include house cleaning, grocery store visit and going to the dump.  Depending on how hectic work is, this can also be an elective category for a list.  Sometimes if I create a list for this category, there are spaces in time created for an element of creativity but normally STAGE THREE items find their way in.
  • STAGE THREE: necessary things that can be put off for a while but not forever.  These things include cleaning fish tanks in the house (we’ve got three), giving dogs hair cuts (again we have three and accomplishing this in a timely manner cuts down on hours of having to chase dog fur balls around the house with a vacuum), weeding the garden and general household organization.  This category also requires a list because I never know when I have an extra window of time available to take care of these things and I have a horrible memory so a list is handy.
  • STAGE FOUR: this category contains the things I actually enjoy doing but sadly find their way to the bottom.  Crafting, creating, going to craft stores, putting in a good movie and just finishing a project that was started months ago…writing a blog entry (I’m breaking protocol today because a dog fur ball just went scooting across the hallway floor…)  These items don’t have a list because there’s only about 5% of my time that I can give to them and I only address what will make me happiest at that particular moment.

So, here’s my quandary…life seems to have taken over my creative side.  I’ve tried to make STAGES 1-3 as efficient as possible but I seem to get really tired when I’m done with what needs to be done.  Sort of makes me sad sometimes but I guess that’s better than feeling guilty.  The sad thing is that I have an incredible husband that’s very helpful around the house but there are always lists to be made and crossed off every day.

In a bigger picture, I dream of having my own little shop on Etsy where I can sell my crafts.  Actually I have a shop built but there’s nothing in it.  If for some reason I do ever load any items on Etsy, I don’t think I’d have time to take care of it and keep it updated at this point in time.  God forbid I actually sell anything!  How in the world would I make it to the post office to mail it out?  So, almost in a defeated manner, I’m a forum lurker on Etsy…continuing to dream about a day where I can just create things for hours one end…

Am I the only one?

Grievous Crafting Blog Neglect…GUILTY!!!

Standard

Yes, I know…I’ve been neglecting my blog horribly.  I actually stepped away from it completely for about a year.  It’s kind of strange because, with what little free time I have, I’ve actually been experimenting with new crafts lately.  I’m surprised that I haven’t been updating more.

ANYWAY…

After being away from my blog for so long I’ve discovered something rather interesting; somehow my blog got 3000+ views while I was away and I wasn’t even trying!  The second rather interesting thing I’ve discovered was that the Internet isn’t nearly as random as one hopes; you actually have to line yourself up to be seen.  I bought this book about keyword SEO and have been applying it to this blog as sort of an experiment. The third interesting this that I’ve discovered is that I’ve dragged my feet long enough when it comes to establishing my on line presents with my “crafting”.  Many times I’ve been told that my goods are worthy of sales on line and since I’m absolutely running out of room…it’s time.  I’ve been reading up on how to open a store on Etsy so the story shall continue.

Anyway, I’m curious how my experiment goes with the SEO…very curious as to if it’s going to make a difference.

Pyrography and painted trinket box

Standard

Busy busy busy….

So this past Christmas, my Hubby gave me the most amazing present I think I’ve ever gotten; a work bench in my craft room!!  Craftsman to be exact!  It’s got the awesome magnifier light and the comfy swivel seat that has the footrest bar along the bottom.  The best part is that there are bunch of drawers along the side that I absolutely love!!

Anyway, this is another box that looked absolutely beautiful without the color added to it.  I was pleasantly surprised when I was finished and it seemed to work out.  I wanted the color to stand out with bold colors and then the outside “leaves” to be more subdued.  I think it worked out pretty well.

Again, thanks for looking!!!